Saturday, December 12, 2015


Work Boxes!!!!

Hey there! 

As I promised, I am posting more of the work boxes in my classroom! I got the idea for a few of these on Pinterest and I came up with a few of them on my own! Here they are:


I think I saw this idea online. I bought these containers and puff balls at Dollar Tree (love that place). This is really good for reinforcing one-to-one correspondence. The student has to put one puff ball in each container and then put the lids on. The firs picture is how it starts when the student gets the box and the second picture is the finished product.


This task is sorting forks, spoons and knifes. I bought the plastic silverware in a package at Dollar Tree and the tray also at Dollar Tree. At first I didn't have the purple construction paper in it but the students weren't sure where to start so I added those. This is a great life skills task! (left is the start, right is the finished product)


This box is sorting numbers. The cubes and trays I got from Dollar Tree and the tong was given to me by another teacher. Students get the box looking like the first picture. They then have to lay the trays out and grab the tong. They have to use the tong to pick up the cube and place it in the corresponding tray (ex. cube with number 2 into the tray with number 2). I require them to use the tong because my students are way past matching numbers, so using the tong adds an OT element to is and makes it a bit more difficult. 


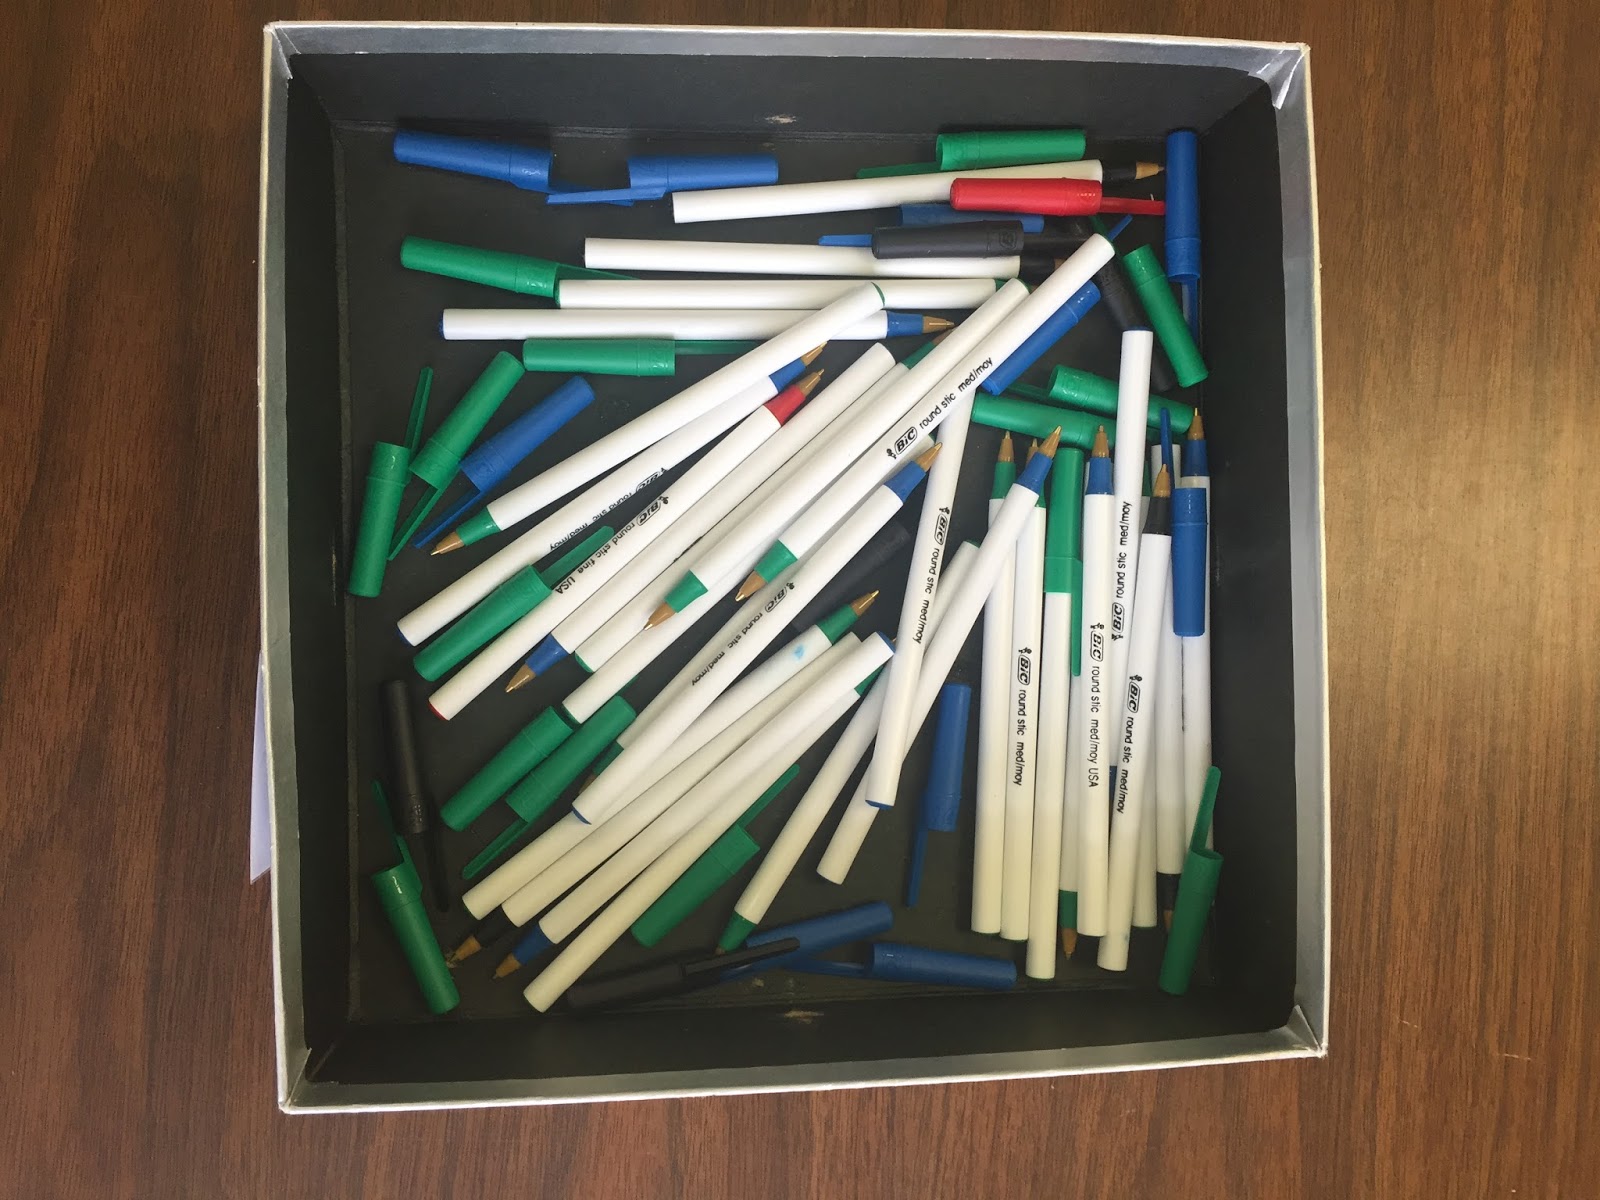
Very simple- put the pen lids on the pens. If you have a lower level student, you can just have them place any lid on any pen. For higher level students, you can have them match the color of the lid to the color of the pen. I got these pens at Target during back to school for less than a dollar!


The work box begins like the first picture. The student takes the cubes out and places the ice tray on the table. They have to match the letter on the cube to the letter in the ice cube tray. Depending on the level, you can add the tong to make it more difficult. The ice cube tray only holds letters A-N so you can make another box with the rest of the alphabet. I got the cubes and the ice cube tray from Dollar Tree.


Very simple task- put the lid on the container. It is a little more challenging than it looks, though. The container is a different color than the lid and that was an obstacle at first, but they caught on quickly after they figured that out. I do not have my higher students do this at all, it is just way to easy for them. I got the containers at Dollar Tree.


This is probably my favorite work box! I got the idea online but I made it my own. I made the papers that say "I see 5 red blocks" on the computer and printed and laminated them. The blocks were given to me from another teacher. I put velcro on the bottom of them and put velcro on the paper, also. The students have to read the words, count the cubes, find the fight color (if indicated) and place them on the paper. The last picture is the finished product! This is a higher level task but it is great for readers!


Those are all the ones I have for you today! I also use file folder games in the work station, but most of those are games I found and printed from online so they are not made by me. As I make more, I will post them on the blog!

Thanks for reading :)

Jess


Tuesday, December 8, 2015

So... I am starting my first blog with a BANG! Work boxes galore!

In my classroom, I have an Independent Work Station that students (usually) visit every day for 15 minutes. This station is used to improve independence skills while working. Many times with students with special needs, they have adults constantly telling them what to do and how to do it. We don't want that to be the case, so I try to instill independence in my students and create systems that allow them to be independent. This is SO important for kids to learn, especially once they enter the working world!


How It Works:

The independent work station has a pretty specific set-up that is very important. On the left side of the work table is their sche
dule. It is on the left side because it is important to work left-to-right (like in reading or in many jobs). After they complete their work box, they place it to the bin on the right (again, they have moved left to right).


When a student approaches the table, they have a schedule of work boxes already laid out for them from my lovely assistants. This is what the schedule looks like:


The students have 3 work boxes to complete each time they go to the station. They have to complete them in order.

Here is where the work boxes are stored:


(Luckily, this shelf came with my classroom.)

Each box has a letter taped to it and a letter attached with velcro. I have seen some people use shapes instead of letters, or they used a 3 shelf bookshelf with the numbers 1,2,3 on that, but I chose to do it this way to add a bit of challenge (my students can handle it!). I haven't completed creating all of the boxes yet; I'm still working on some ideas. Currently, A-T are complete.

I have read before that they suggest that you keep this shelf to the left of your work station, but mine is on the right. That is mostly because of the layout of my classroom; I couldn't put it to the left! In my opinion, I don't find that to be too important.

Completing the Work Boxes:

The student will approach the station and grab the letter next to number 1. 


Then, they will go over to the shelf and match the letter to the corresponding box (match B to box labeled B).


Then, they take the box to the table. All materials needed are in the box already. The materials are not put together. Here is an example: 

Once they bring it to the table, they complete the task! Tasks should be easy, mastered skills that do not require assistance. Of course, you will need to initially teach them how to do it. But, it should be a skill that they are able to catch onto fast. This task box is putting erasers onto pencils. Easy and good for OT skills! Here is the finished product:


When they are finished, it is VERY IMPORTANT that they do not take it apart (ex. taking the erasers back off). I had a few students who instinctively wanted to put it back to the way it was but I had to stop them. I explained this to my assistants like this: if you work at McDonalds, for example, and you make a cheeseburger for a customer, you can't make it and then take it back apart when you're done. When you put it together, it is finished and you hand it over. So when a student finishes a box, they need to leave it as they made it and put it in the bin on the right. 


Then, they grab the letter next to 2 and match it to the corresponding box. They complete the box, put it in the bin and move on to task 3. I have a raise your hand visual after number 3 because whenever my students are finished, they either yell "I'm done!" at me or they just stand at the station doing nothing. This is just an indicator that they need to tell someone that they are finished, but they need to do it in a responsible manner.

And.... that's it! I think... ha!

Let me know if you have any questions! I am happy to share! I will also be posting pictures of all of my work boxes soon, if anyone is interested in that!

Thanks for reading :) !

Sunday, December 6, 2015

About Me

Hello! My name is Jessica Biller. I am a 2nd-4th grade Special Education Teacher. I teach students with intellectual disabilities, autism, developmental disabilities and other cognitive disabilities. I am a first year teacher, so I am learning as I go and I want to share my journey with you! Let me know if there is something you would like to see in my classroom and I will get in contact with you! 

Thank you!
Jess